Friday 15 April 2016

Super Nommy Shortbready Choc Chip Cookies

Hellllloooooooooo!!!!! 

SSHHH - don't look at the date of my last post and then at today's date and then subtract one from the other (which from which... don't ask me, I'm a bear!) and then say something about how long it's been. In short - don't judge. I'm a very slow typist!

And I bring cookies. Cookies make everything better! This is my favouritest ever choc chip cookie recipe cause it's more like shortbread than cookie and i looooooooooove shortbread!


Bill's Shortbready Choc Chip Cookies

Ingredients
  • 200g ( 7 oz) butter (that's unsalted butter folks - the real stuff not margarine)
  • 1/2 cup icing sugar
  • 1 tspn vanilla essence
  • 2 cups plain flour
  • 1/2 cup almond meal
  • 1/2 tspn baking powder
  • 150g (5.3 oz ) chocolate chips
Cooking Directions
  1. Using electric mixer, beat the butter, icing sugar and vanilla until smooth and creamy.
  2. Slowly and gently beat in the flour, almond meal and baking powder until it sort of comes together. At this point it will look mostly crumbly
  3. Add the choc chips and then use your paws (or hands if you are hoomin) to bring the mixture together into a smooth dough
  4. Take tablespoon fulls of the mixture and form into a rough disc, and place onto a baking paper lined baking tray
  5. Bake cookies in a pre-heated 180 C (356 F) oven for 12 to 15 minutes until lightly golden
  6. Cool on a wire rack and stand guard to protect them

And here we go BEAR STYLE........ A Recipe In Pictures......

Beat the butter and sugar........


Add the flour, almond meal and baking powder......


The electric mixer will only get it this far.....


After adding the choc chips, you gotta squish it all together. If you don't like getting your paws dirty, this is where hoomins come in really handy......


Ready to go into the oven.........


Make sure to never miss a photo bomb opportunity!


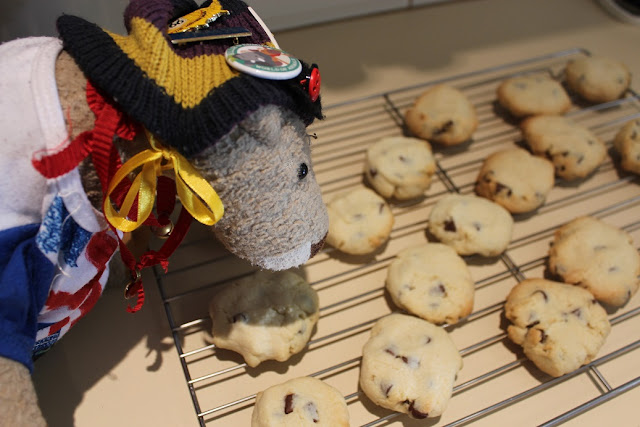
Here they are, all cooked and lightly golden......


Now you gotta stand guard so nobody eats your cookies while they cool.... they are ESPECIALLY nommy hot out of the oven with the choc chips still melty and gooey *drools*......


Bill's Super Nommy Shortbready Choc Chip Cookies.......


Only one thing left to do now friends.......


nom nom nom nom nom

Bill xx


Monday 9 June 2014

Croquembouche - Part 2 - the custard and construction


Ok, so you've made the profiteroles, now it's time to stuff them with yummy custard and build a big towering croquembouche - or like my Twitter friend Rosie calls them, a Croquemthing.

You need to make a custard - I like to make mine half with vanilla custard and half chocolate, but you could really make any flavours you like. here is the boring hoomin format recipe for the custard.....


Creme Patissiere for Profiteroles and Croquembouches

Ingredients
  • 3 cups milk
  • 1 cup sugar
  • 3/4 cup sifted plain flour
  • 4 eggs
  • 1 tspn vanilla essence
  • 100 g dark cooking chocolate
Cooking Directions
  1. Combine flour and sugar in a medium saucepan.
  2. Stir in the milk and continue stirring until mixture bubbles.
  3. Cook for 3 to 4 minutes, stirring constantly, until mixture thickens.
  4. Remove from heat and mix 1 cup of the hot mixture into the beaten eggs.
  5. Return egg mixture to saucepan and cook until thickened, stirring all the time. Do not allow to boil.
  6. When thickened, pour half of the mixture into a separate bowl. To this half, add the vanilla extract.
  7. Add the chocolate (broken into small pieces) to other half of custard and stir until chocolate is melted and mixed through.
  8. Cover custards with plastic wrap and let cool completely.

And here we go BEAR STYLE..... (sorry the pictures aren't so great - I had to take my selfies with an Eye Phone)

Stir the flour and sugar into the milk and keep stirring over a medium heat till thickened......


Beat up your eggs and when the milk mixture is thick, add a cup of it to the eggs and mix, mix, mix. Then return the egg mixture to the pan and keep stirring over a low heat till it's nice and thick.....


If you're super smart (like ME), you can delegate here - get your mummy or another bear to do the boring stirring while you do something more important like......EAT SOME CHOCOLATE!!


OK! Back to the custard. When it's nice and thick take it off the heat and separate out 1/2 of it.....


Add the vanilla to one half, and the chocolate to the other half.....


Stir the chocolate through till it's nice and melted and mixed right through......


Then cover the custards with plastic wrap (this stops a skin from forming over them) and wait till they are completely cooled. You may have to guard them during this time - in case any other bears get custardy ideas!!


You then need to pipe the custard unto the profiteroles. I do it the old fashioned way - with a piping bag and nozzle. Here's a good way to fill the piping bag if you don't have 3 paws, or have very short arms like me - pop it into a tall glass or jug so you can just pour the custard into it :)


When all your profiteroles are filled, pop them into the fridge until you're ready to assemble your dessert.

Then make your toffee.......

SO - here's how it should go.......put 1 cup of sugar and 1/3 cup of water into a small saucepan and stir over heat until sugar has dissolved. Then cook over medium heat without stirring until light golden brown.
here is the point where I should have taken it off the heat......


But Silly Billy! I thought "just a few seconds more" and with caramel that's all it takes to go from perfect to OH MY GOODNESS IT'S TURNING BLACK!!!! and all the smoke detectors ringing.

*sigh*

Plan B - melt some chocolate and use THAT as your glue.


And there you have it - a yummy choc covered Croquemthingy - all heaps easier than hoomins make it out to be!


Only one thing left to do now friend.......nom nom nom!

Bill xx


Wednesday 4 June 2014

Profiteroles


 Hi friends!

Well, being Bill, I decided to make an over-the-top dessert this weekend. I made a croquembouche! This is a nommy French "cayk" made from a tower of custard filled profiteroles and USUALLY held together with toffee. But I used chocolate instead :)

Here is the recipe in boring hoomin format:

Profiteroles

Ingredients
  • 1 cup water
  • 125g unsalted butter
  • 1 tspn sugar
  • 1 cup flour
  • 4 eggs
Cooking Directions
  1. Pre-heat oven to 200C.
  2. Put water, butter and sugar in a large saucepan over a medium heat and bring to a rolling boil.
  3. Add flour all at once and beat with a wooden spoon until mixture forms a ball that comes away from the sides of the saucepan.
  4. Add eggs, one at a time, beating well after each addition. The dough should be thick and glossy.
  5. Use two tablespoons dipped in water to form balls of dough on a prepared baking tray *be aware that the profiteroles will magically grow when cooking, so make them about 1/2 the size you want them to be).
  6. Splash a little water over the dough before putting in the oven (this creates steam which helps the cooking process).
  7. Bake in your hot oven for 30 to 35 minutes - until golden brown.

Now for the recipe Bill style.......a recipe in pictures......

Pop the butter, water and sugar in a large saucepan and cook on medium heat until butter melts.....


....and it comes to a rolling boil.....


Then (while still on the heat) dump in your cup of flour - all in one go - and mix mix mix mix mix with a wooden spoon until it forms a nice smooth ball that comes away from the edges of the pan....


Ok - the next bit takes muscles. you need to add 4 eggs - one at a time - and beat really well after each addition so the egg gets mixed in nicely and the dough is nice and smooth. Now, I think we all know that handsomeness I have in abundance but muscles....nope, not this bear! So I cheat - I get Alfred to mix the eggs for me......


(Alfred is my Kitchen Aide mixer :) )

Once your dough is ready, spoon tablespoons-full onto your prepared baking trays in the form of rough rounds. Don't worry too much about the shape - the water in the dough will form steam when the profiteroles cook and this will make them puff out into big ball shapes. Because the dough can be quite sticky, it's easiest to use two spoons dipped in cold water to form your dough balls. Or you could pipe them.


With your paw (or hand) splash a bit of water over the top - this makes more steam and helps with the cooking process. Now stick them into a HOT oven for 30 to 35 minutes. they will look something like this when cooked.....


You can now fill them with creme patissiere (aka custard), or whipped cream and eat them as is, covered in icing or ganache, or hot choccie sauce, or just sprinkled with icing sugar. Or you can make one of these pawesome croquembouche towers like I did. I'll run through the steps for that in my next post RIGHT HERE 

While you're waiting you can always taste test some of these.....nom nom nom

Bill xx

Thursday 24 April 2014

Anzac Biscuits

Hello friends!

Today is Anzac Day down here in Aussie Land, so I just had to make a batch of Anzac Biscuits :)


Sorry about the bad picture quality - I just had time for a quick selfie with the Eye-Phone before the biscuits strangely started disappearing!!

Here is the recipe:

1 1/4 cups plain flour
1 cup rolled oats
1/2 cup caster sugar
1 cup dessicated coconut
150g butter, melted
2 tbspn golden syrup (or treacle)
1 tspn bicarb soda

Pre-heat oven to 180C

Mix the dry ingredients in a large bowl

Melt butter in a small pan, along with the golden syrup. When butter is melted, take off the heat and add the bicarb soda. It will froth up and look really cool! Add this to the dry ingredients and mix well.

Roll tablespoons of mixture into balls and place on a baking tray that has been lightly greased (or just use a sheet of baking paper - that's what we lazy bears like to do). Flatten slightly and leave about 3cm between biscuits as they will grow a bit when you cook them.

Pop them into the oven and bake for about 12 minutes. 

Take them out as soon as they start to look golden if you like them soft and chewy, or give them a couple more minutes till they are light brown if you prefer them a bit more on the crunchy side. I'm a soft and chewy bear :)

And then....just one thing left to do.....nom nom nom!

Bill xx


Thursday 27 February 2014

Fluffy the Fluffy's Romantic Valentine's Dinner

Hi friends!

Wow, it HAS been a while, but like my friend Jeremy likes to point out, I am a very lazy bear.

ANYWAY......ignoring the great big time lapse, let's get right into it and talk about Valentine's Day - aka International Chocolate Day. You may not all know this, but I have a very special BF. Her name is Fluffy the Fluffy and she lives in twitterland. She's my BF (Bunny Friend) and I'm her BF (Bear Friend). It's a long distance relationship, but hey, that works just fine. Isn't she purty?!


So for Valentine's this year, I made Fluffy a very romantic dinner. And wouldn't you know it - STOOPID TWITTA ate most of it and poor Fluffy didn't even get to see her dessert. So here it is again, in detail, with even a recipe thrown in.....so Fluffy can enjoy it...and to show the rest of you guys how it's done. 'Cause you all know I'm such a modest bear, right?

It was a very busy day in the kitchen. There was the mixing of ice-cream...... 


.....melting of chocolate......


....beating of eggs......


....pureeing of raspberries.....


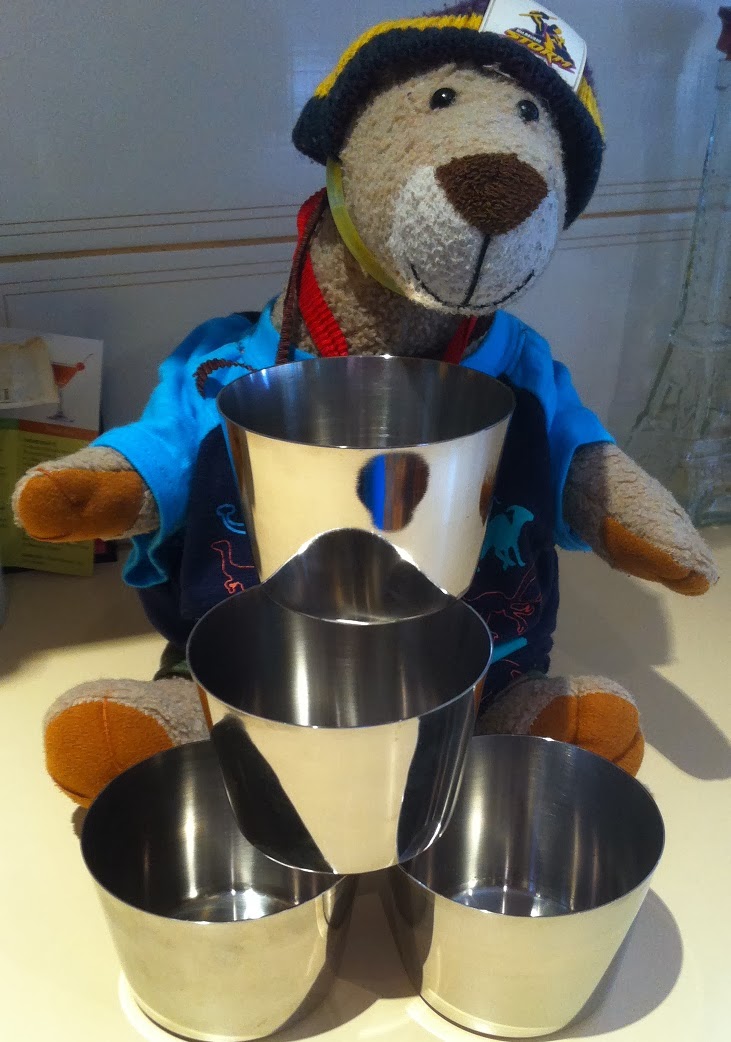
...and most importantly, the building of mold towers!!


I had to be careful with the potato chips (being flammable and everything!), lucky for long-handled implements!


Dinner was Veal Parmigiana served with home-made potato chips and rocket salad (yeah, I know - green stuff - yuck! But Fluffy's a RABBIT!!).........and set in a very romantic place - the grounds of Hogwart's!


For dessert, we had Chocolate Fondant (aka Lava Cayk) with Cappuccino Ice-Cream, Whipped Cream and Raspberry Coulis. Doesn't it look just nommy!!?


Here's what the fondant looks like inside.....


Perfect!! I was very proud of myself as I'd never made one before :)

And here is the recipe for the Chocolate Fondant - or, as we bears call it when we're not trying to be la-dee-da - Chocolate Lava Cayk!
Thanks to the TASTE website!

Ingredients:

  • 85g caster sugar
  • 150g butter, chopped
  • 150g 70% cocoa dark chocolate, chopped
  • 3 egg yolks
  • 3 eggs
  • 1 tbsp plain flour
  • Double cream and strawberries to serve

Method:

  1. 1
    Grease and line four small pudding moulds with baking paper.
  2. 2
    Whisk together egg yolks and eggs and set aside.
  3. 3
    Place sugar, butter and chocolate into a heatproof bowl and place over simmering water stirring until all ingredients are melted.
  4. 4
    Remove from heat and whisk for a moment to ensure no lumps or grains.
  5. 5
    Add a small amount of the egg mixture and whisk vigorously until combined, repeat adding small amounts of the egg mixture and whisking until all combined and the mixture has a glossy smooth texture.
  6. 6
    Fold in flour.
  7. 7
    Pour into moulds and set aside in fridge for a couple of hours or until chocolate mix is set.
  8. 8
    Preheat oven to 180c.
  9. 9
    Arrange moulds on baking tray and bake in oven for 16 minutes.
  10. 10
    Ensure that fondants appear cooked on top, but do not allow overcooking.
  11. 11
    Take out of oven and let stand two minutes before turning onto serving plate. Ensure that you are gentle when removing baking paper as with the soft centre the fondants are quite fragile.

Now there's just one thing left to do.......nom nom nom!

Bill xx


Sunday 29 December 2013

Christmas Baking - Snickerdoodles!

Hi friends!

It's been really really busy around here over Christmas....and yes, I've been really really lazy.....so this blog post is a little late in getting out. I know some of my friends have been waiting very patiently for this. And others have quite bluntly said "hurry up Bill!" so here I am....I've peeled myself off the lounge and am ready to tell you about my lovely Kitchen Adventure baking Snickerdoodles.

Firstly, snickerdoodles are NOT made out of snickers chocolate bars :) They are a super yummy USA sugar cookie that is rolled in cinamon sugar before baking. Yes, they are the cinamon donut of the cookie world.

Yes I know, stop talking Bill and show us the cookies! But first - credit where it's due.
Thank you to my friends Ellie and Edmond for introducing me to these lovely treats!
And thank you to Mrs Betty Crocker for the recipe :)

I won't write out the recipe here - just click on the link above and be magically taken to Mrs Crocker's recipe page. One note for non-American kitchen friends........ our friends in the USA have an ingredient called shortening. I don't know about Europe, but here in Aussie Land we don't have anything that really compares, so I just used extra butter instead of shortening. It worked out real well.

Ok - PHOTOS! Here we go.........the Snickerdoodles........here they are just out of the oven.....


They look quite yummy don't they. Can you see the cinamon?.....

 The recipe sure made a lot of cookies!!!!!.........


I let my Mumma Bear have one with her cup of tea. (Just one mind you).......


Well, you know what we do now don't you friends?
.......nom nom nom

Bill xx

Friday 20 December 2013

Mini Christmas Pudding Balls

Hi friends!

One of my favourite things about Christmas is the nommy Christmas food. Mumma Bear and I have been very busy in the kitchen - she has to supervise me whenever I use the stove or the oven......something about me being highly flammable!

Here is one of my favourite Christmas treats. It's very yummy and super easy to make, so very bear friendly! Mini Christmas Pudding Balls!
.....as always - a recipe in pictures :)

You'll need 400g of fruit cake (that's about half of a store bought fruit cake if you live in Aussie Land). Crumble it all up in a big bowl so you have fruit cake crumbs....


Then melt 100g of dark chocolate with 60g butter. None of that bowl over the pan of simmering water nonsense.....if you have the heat really low you can just melt this straight on the stovetop - the butter gives it a high enough fat content that you won't burn the chocolate. Just keep stirring over a teeny heat and take it off the heat when about 80% melted. Keep stirring and the residual heat will finish the melting for you....


....stirring....stirring....stirring......


Pour this chocolate mixture into the cake crumbs and mix it all together.....


Ok now, here's the messy part.....you may want to wear disposable gloves like I do.....


Get tablespoon fulls of the mixture and roll it into balls.....like this......


Place all the balls on a tray lined with baking paper and stick it in the fridge for a couple of hours.....


When they have been in the fridge for a while, the pudding balls will feel firm and be easy to decorate. You can use icing or white chocolate and then sprinkle anything you like over the top. I've used white chocolate and decorated with metallic cashous, Wilton's sugar gems and sprinkles, and crushed candy canes....


You know the rest don't you friends.......only one thing left to do.......nom nom nom


Merry Christmas!


Bill xx