Thursday, 27 February 2014

Fluffy the Fluffy's Romantic Valentine's Dinner

Hi friends!

Wow, it HAS been a while, but like my friend Jeremy likes to point out, I am a very lazy bear.

ANYWAY......ignoring the great big time lapse, let's get right into it and talk about Valentine's Day - aka International Chocolate Day. You may not all know this, but I have a very special BF. Her name is Fluffy the Fluffy and she lives in twitterland. She's my BF (Bunny Friend) and I'm her BF (Bear Friend). It's a long distance relationship, but hey, that works just fine. Isn't she purty?!


So for Valentine's this year, I made Fluffy a very romantic dinner. And wouldn't you know it - STOOPID TWITTA ate most of it and poor Fluffy didn't even get to see her dessert. So here it is again, in detail, with even a recipe thrown in.....so Fluffy can enjoy it...and to show the rest of you guys how it's done. 'Cause you all know I'm such a modest bear, right?

It was a very busy day in the kitchen. There was the mixing of ice-cream...... 


.....melting of chocolate......


....beating of eggs......


....pureeing of raspberries.....


...and most importantly, the building of mold towers!!
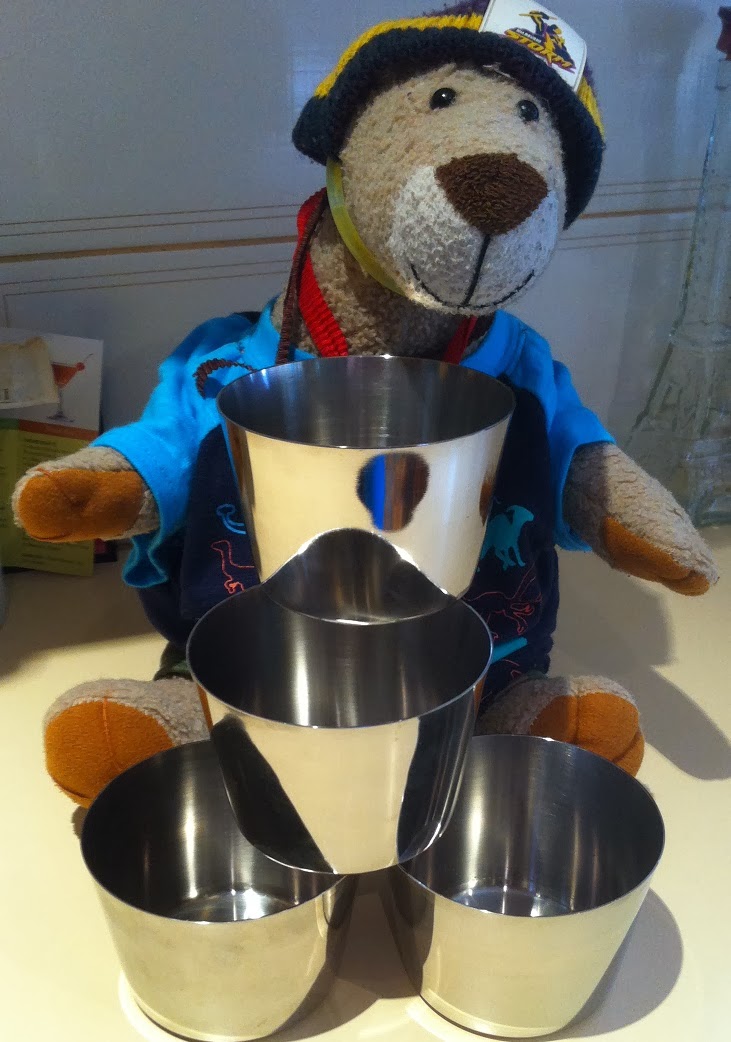

I had to be careful with the potato chips (being flammable and everything!), lucky for long-handled implements!


Dinner was Veal Parmigiana served with home-made potato chips and rocket salad (yeah, I know - green stuff - yuck! But Fluffy's a RABBIT!!).........and set in a very romantic place - the grounds of Hogwart's!


For dessert, we had Chocolate Fondant (aka Lava Cayk) with Cappuccino Ice-Cream, Whipped Cream and Raspberry Coulis. Doesn't it look just nommy!!?


Here's what the fondant looks like inside.....


Perfect!! I was very proud of myself as I'd never made one before :)

And here is the recipe for the Chocolate Fondant - or, as we bears call it when we're not trying to be la-dee-da - Chocolate Lava Cayk!
Thanks to the TASTE website!

Ingredients:

  • 85g caster sugar
  • 150g butter, chopped
  • 150g 70% cocoa dark chocolate, chopped
  • 3 egg yolks
  • 3 eggs
  • 1 tbsp plain flour
  • Double cream and strawberries to serve

Method:

  1. 1
    Grease and line four small pudding moulds with baking paper.
  2. 2
    Whisk together egg yolks and eggs and set aside.
  3. 3
    Place sugar, butter and chocolate into a heatproof bowl and place over simmering water stirring until all ingredients are melted.
  4. 4
    Remove from heat and whisk for a moment to ensure no lumps or grains.
  5. 5
    Add a small amount of the egg mixture and whisk vigorously until combined, repeat adding small amounts of the egg mixture and whisking until all combined and the mixture has a glossy smooth texture.
  6. 6
    Fold in flour.
  7. 7
    Pour into moulds and set aside in fridge for a couple of hours or until chocolate mix is set.
  8. 8
    Preheat oven to 180c.
  9. 9
    Arrange moulds on baking tray and bake in oven for 16 minutes.
  10. 10
    Ensure that fondants appear cooked on top, but do not allow overcooking.
  11. 11
    Take out of oven and let stand two minutes before turning onto serving plate. Ensure that you are gentle when removing baking paper as with the soft centre the fondants are quite fragile.

Now there's just one thing left to do.......nom nom nom!

Bill xx


Sunday, 29 December 2013

Christmas Baking - Snickerdoodles!

Hi friends!

It's been really really busy around here over Christmas....and yes, I've been really really lazy.....so this blog post is a little late in getting out. I know some of my friends have been waiting very patiently for this. And others have quite bluntly said "hurry up Bill!" so here I am....I've peeled myself off the lounge and am ready to tell you about my lovely Kitchen Adventure baking Snickerdoodles.

Firstly, snickerdoodles are NOT made out of snickers chocolate bars :) They are a super yummy USA sugar cookie that is rolled in cinamon sugar before baking. Yes, they are the cinamon donut of the cookie world.

Yes I know, stop talking Bill and show us the cookies! But first - credit where it's due.
Thank you to my friends Ellie and Edmond for introducing me to these lovely treats!
And thank you to Mrs Betty Crocker for the recipe :)

I won't write out the recipe here - just click on the link above and be magically taken to Mrs Crocker's recipe page. One note for non-American kitchen friends........ our friends in the USA have an ingredient called shortening. I don't know about Europe, but here in Aussie Land we don't have anything that really compares, so I just used extra butter instead of shortening. It worked out real well.

Ok - PHOTOS! Here we go.........the Snickerdoodles........here they are just out of the oven.....


They look quite yummy don't they. Can you see the cinamon?.....

 The recipe sure made a lot of cookies!!!!!.........


I let my Mumma Bear have one with her cup of tea. (Just one mind you).......


Well, you know what we do now don't you friends?
.......nom nom nom

Bill xx

Friday, 20 December 2013

Mini Christmas Pudding Balls

Hi friends!

One of my favourite things about Christmas is the nommy Christmas food. Mumma Bear and I have been very busy in the kitchen - she has to supervise me whenever I use the stove or the oven......something about me being highly flammable!

Here is one of my favourite Christmas treats. It's very yummy and super easy to make, so very bear friendly! Mini Christmas Pudding Balls!
.....as always - a recipe in pictures :)

You'll need 400g of fruit cake (that's about half of a store bought fruit cake if you live in Aussie Land). Crumble it all up in a big bowl so you have fruit cake crumbs....


Then melt 100g of dark chocolate with 60g butter. None of that bowl over the pan of simmering water nonsense.....if you have the heat really low you can just melt this straight on the stovetop - the butter gives it a high enough fat content that you won't burn the chocolate. Just keep stirring over a teeny heat and take it off the heat when about 80% melted. Keep stirring and the residual heat will finish the melting for you....


....stirring....stirring....stirring......


Pour this chocolate mixture into the cake crumbs and mix it all together.....


Ok now, here's the messy part.....you may want to wear disposable gloves like I do.....


Get tablespoon fulls of the mixture and roll it into balls.....like this......


Place all the balls on a tray lined with baking paper and stick it in the fridge for a couple of hours.....


When they have been in the fridge for a while, the pudding balls will feel firm and be easy to decorate. You can use icing or white chocolate and then sprinkle anything you like over the top. I've used white chocolate and decorated with metallic cashous, Wilton's sugar gems and sprinkles, and crushed candy canes....


You know the rest don't you friends.......only one thing left to do.......nom nom nom


Merry Christmas!


Bill xx


Tuesday, 26 November 2013

Cooking with Marmite - Marmite Rarebit

Hi friends!

Ok, ok....my German furends are shaking their heads at me for taking so long about it......se here we go....

My special BF (Bunny Friend) from twitter Miss Fluffy the Fluffy recently sent me some lovely presents from the UK and from her trip to Germany. These included some Marmite samples and...a Marmite COOKBOOK! Miss Fluffy knows I like to cook so this is such a fun surprise.


Here is my first cooking adventure with Marmite - Marmite Rarebit. It's a very bear friendly recipe (for the most part) so go ahead Anipals - kick the hoomins out of the kitchen and give it a try.....

There's been a bit of talk on twitter about Vegemite (the Aussie Land version) versus Marmite. I was a little bit nervous about trying Marmite 'cause I really REALLY don't like Vegemite! Guess that's why I picked a recipe with lots of other elements to hide that Marmite taste...heehee. Marmite looks a bit different from Vegemite - it's more runny for starters....


...and it's really glossy...


Ok, let's cook! First you need to toast a nice slice of bread. Butter it and spread it with Marmite. Like I said - I was a bit nervous so I only used a teeny bit of Marmite.....


Then sprinkle a bit of grated cheese and a dash of worcestershire sauce over the top and stick it under the grill to melt.
While that's happening, poach an egg and when the cheese on your toast is melted, lay the egg over the top.

Don't tell my Mumma Bear it took me three attempts to get a good looking poached egg. Hey, I've never done it before! And I'm a bear!! Maggie Puppy was happy to get the 2 misfits :)


And there you have it friends - Marmite Rarebit!
Only one thing left to do..... nom nom nom....


Bill xx

And a little post script....did I like it?
Well, a picture says a thousand words.....


B.


Friday, 22 November 2013

Chocolate Muffins - don't tell anyone there's BEETROOT in them!!

Oh my GOODNESS! It's been a while since I cooked something! But friends - winter is over here in Aussie Land, the warm weather is here, I'm out of hibernation.......Bill's getting his cook on! (and I DON'T mean that in the naughty Breaking Bad sense of the word!!).

Did you know that you can make chocolate muffins out of beetroots? Well, they have chocolate in them too, but the beetroot makes them moist and give them a purpley 'red velvet cake' kinda look.

They're really easy to make too.
First you need to cook 2 large beetroots. Wash and trim them first and cut off the leaves but leave about 3cm of the stem attached. Boil, steam or microwave them until really tender. Once they're cooked, peel them while they're still warm and blend them up in one of your kitchen robots like this one.....


You'll need about 1 and 1/3 cups of beetroot puree.
Sift into a big bowl 1 and 3/4 cups of self-raising flour, 1/3 cup of cocoa powder and 1 cup of sugar.
Stir in the beetroot puree as well as 2 eggs, 1/3 cup of vegetable oil and 1/3 cup of milk.


Spoon the mixture into your muffin tin (don't forget to grease it if you're not using baking cups) and cook them in a 180C oven (that's 355F for my USA buddies) for about 25 minutes. 
This is what they look like when they're cooked.......


Now you can eat them as muffins........


.....OR..... you can jazz them up with some icing or ganache like I did.
Then there's only one thing left to do.......nom nom nom......


Bill xx

Saturday, 3 August 2013

Pavlova - A Recipe in Pictures.

Pavlova is one of my favouritest desserts so today I am going to share my Bestest Pavlova Recipe.
I like to make a super giant one, so I usually add an extra 50% of everything (6 egg whites instead of 4...etc..).
And in case you're a bear like me...I'm including visual aides!
Here we go...

Put 4 egg whites into bowl of electric whipping machine.....


and also add 1/2 cup of caster sugar.....


Plug in the electric whiperer and let it beat until egg whites begin to look stiff.....


Now keep it beating and add another 1/2 cup of caster sugar, a tablespoon at a time, until the sugar is dissolved. This will take about 5 minutes of beating, so while you wait for the machine to do it's thing, take out your cornflour and white vinegar.....


Add 3 teaspoons of cornflour and 1 teaspoon of vinegar to the stiffened egg whites and gently fold them through with a big metal spoon.....


Line a big, round, flat baking pan with baking paper (or dust it with lots of cornflour) and plop your mixture onto it. Then gently spread it around a bit so it forms a big cakish shape. Run a flat knife around the edge if you want to give it a nice form.....


Then pop it into a slow oven at 150C (or 300F for my American friends) for about an hour and a half. This is what it should look like when it's cooked - slightly slightly coloured with a crunchy meringuey crust.....


Ok, now you need to let it cool for a couple of hours. While you're waiting, you can check that your cream doesn't have poison in it by tasting some of it....but make sure you leave some to decorate the pav with!!!


Electric mixer time again......whip the cream with a tablespoon of icing sugar and a teeny splash of vanilla essence and spread it all over your cooled pavlova......


Then the fun bit - decorations! Pavlovas are traditionally decorated with lots of yummy summertime fruit but I like to use raspberries and shaved chocolate. It's up to you - you can decorate it with whatever you like (though I don't recommend anchovies!).....


Only one thing left to do now friends....nom nom nom.....


Bill xx


Friday, 14 June 2013

OH MY GOODNESS OH MY GOODNESS OH MY GOODNESS - A Hawaiian Surprise from Tour Guide Ted

Hello friends!

I was very excited when my Twitter Friend Tour Guide Ted asked for my address so he could send me a little surprise from Hawaii! Tour Guide Ted is a world travelling bear with the coolest travel website ever and he has just returned from a trip to the Hawaiian Islands (lucky Ted!) Now of course I played it cool - wouldn't want to look TOO excited.....


Then this morning - a parcel arrived!! By ROYAL MAIL! At first I thought maybe the Queen of England was sending me mail......


But no - it was FAR more exciting than that....


Bears LOVE parcels! Especially padded ones that are so cuddly.....


After a little parcel cuddle, I had a peek inside....


Mmmmmmm....smells nice in there! Lets tip it out and see.......


OH MY GOODNESS OH MY GOODNESS OH MY GOODNESS!!!!!!!!!!
Tour Guide Ted has sent me a lei
and a Kona Coffee & Macadamia chocolate bar
and MACADAMIA Hersheys Kisses
I'm so impressed that my friend has his own business card - doesn't he look handsome and professional!
He even sent me a postcard of his Holiday Villa in Florida....I know where I'll be booking if I ever get to that part of the world!!


Now, I'm (usually) a nice bear who shares....well, SOMETIMES! Here I am with my friend (and lawyer) Sir Wolfgang von Heiffen Steiffen. We're having a Hawaiian Tea Party!


Ok, just one thing left to do now......no, actually TWO.
Firstly - THANK YOU TOUR GUIDE TED - I have to shout because he lives really really far away and I don't have Twitter on at the moment.
Ok, NOW there's just one thing left to do....nom nom nom

Bill xx